The Ultimate foobar2000 Setup*
*) Subjectively.
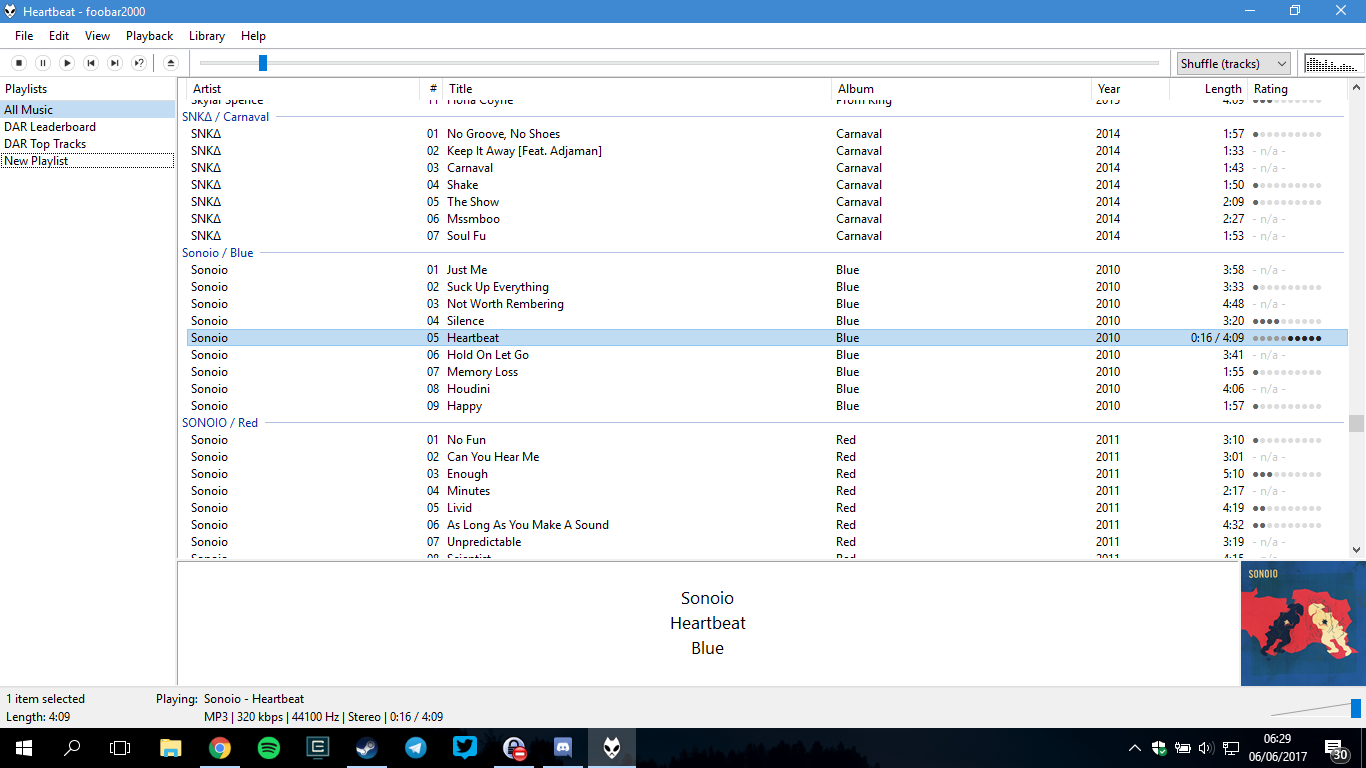
(Last updated: 19 November 2017)
foobar2000 (fb2k) is the most lightweight, powerful, customizable music player I've ever used. I switched over from iTunes, as I was getting tired of the bloat it has become, and I have never turned back ever since.
Of course, I did initially run into some concerns that it won't be able to do the things that I always found useful on iTunes. And with fb2k's bare, customisation-focused experience, it does certainly look unappealing to the casual music listeners, and it really involves a lot of tweaking to really improve the user experience. After hours of tweaking, I finally managed to pull it off, and my fb2k installation now looks beautiful.
Here's a guide on how to make your fb2k look more like the one above. Sure, this might not be the best setup there is, but at least it makes your fb2k experience more bearable. Each section will outline the required components for you to download and follow along.
Interface
Required components:
The default fb2k interface is fine, but unfortunately it lacks some pretty important features, like customizable playlist views, and most importantly, thumbnail toolbars with playback controls like most other music players have.
When I started transitioning to fb2k, a friend of mine recommended that I use Columns UI, and I loved it at first sight. It improves much of fb2k's user experience, and it also adds thumbnail toolbars to your taskbar, without any additional components needed. It's pretty much a multi-purpose UI kit for fb2k.
After you've finished installing Columns UI and set it as your default UI, you will be presented with this screen.
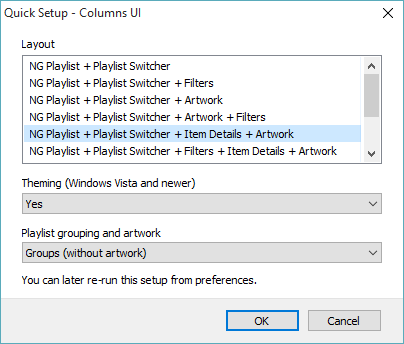
Here you can choose a number of quick UI presets for you to get started, but if needed, you can later customize it from Preferences > Display > Columns UI > Layout.
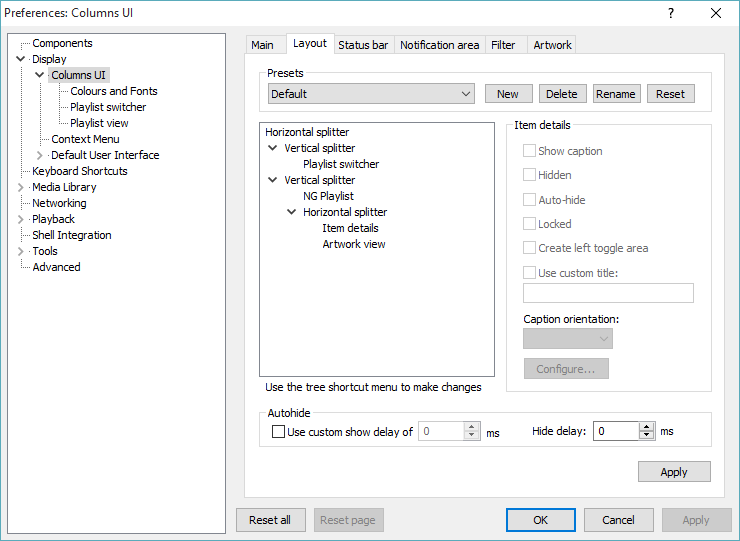
Unfortunately, I've never touched this section, so look up on how you play around with this section yourself, I guess. If you're wondering why I recommended you use Columns UI, we'll get to that later.
Automated track ratings
Required components:
One other thing that fb2k lacks is a rating system. I've tried looking for some random components that does this but none of them do what I wanted. Then I came across this article explaining the Date and Duration Adjusted (DADA) auto-rating algorithm, an automated, algorithm-based rating system for fb2k.
The article above provides an in-depth explanation on how the algorithm works. It does take a while to understand how the algorithm makes any sense, but four or five months in, you'll start to see it really kick in.
This link shows in detail how to get the DADA algorithm up and running, complete with all of the options that are available. If reading's not your thing, follow these guides.
First, open File > Preferences > Media Library > Dynamic Fields, click on the Add Field (+) button, and name this field dynamic_rating.
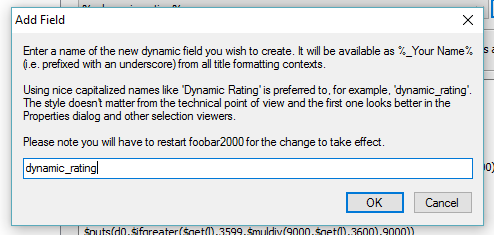
Then, on the "Title formatting expression" textfield, paste the following:
Then set your recalculation interval in the dropdown at the top. I usually set it to 5 minutes. Then click "Okay" twice, and fb2k will restart.
Now, to add the column to our playlist view, go to File > Preferences > Display > Columns UI > Playlist View, then click on the Columns tab.
Add a column at the very end. Let's call it "Rating."
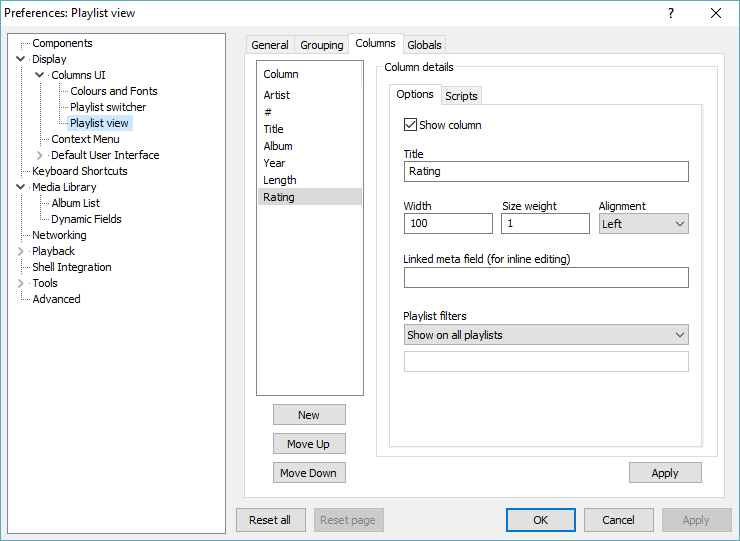
Now, click on the Scripts tag, and paste the following into the textfield on the "Display" tab.
This will give you a nice visual of the rating, with dots, as seen below. If you want to just use the actual number for this column, just type %_dynamic_rating% into the same textfield.
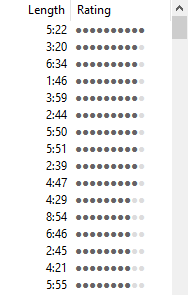
Congrats, you now have the DADA rating installed!
DADA-curated playlist
Required components:
Now that we have the DADA rating system set up, what I like to do now is to create a "Top Tracks" autoplaylist which sorts out all tracks based on its DADA rating, and this is where Columns UI comes into play. Columns UI includes something called "NG Playlist", which allows for further customisations to your playlists.
If you take a look at my first screenshot, the "All Music" playlist are grouped based on albums. Obviously I wouldn't want the same grouping for the Top Tracks playlists. So far, Columns UI is the only component that I can find that supports different grouping schemes for playlists.
If you open Preferences > Playlist View > Grouping, you will see this.
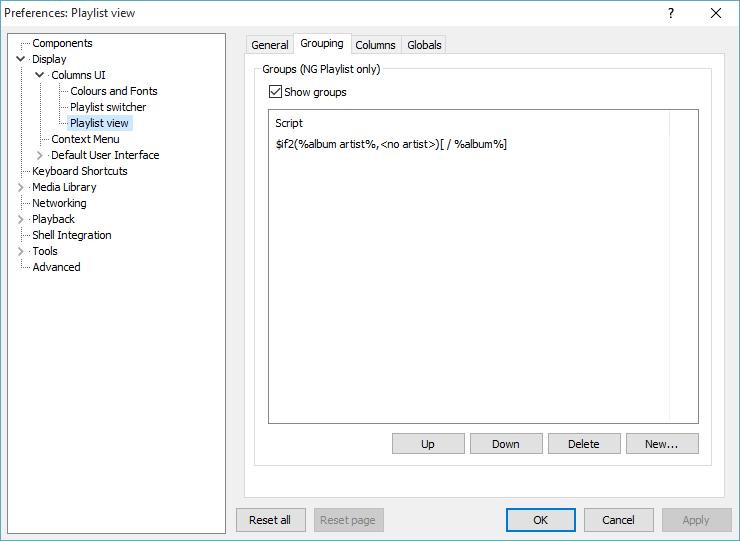
The first grouping rule in that window is included by default. But we're gonna tweak it a bit by double clicking on it. Then, on the playlist filters, select "Hide on playlists" from the dropdown, and add the playlists that you want the grouping rules to be ignored at, separated by semicolons. Here's an example.
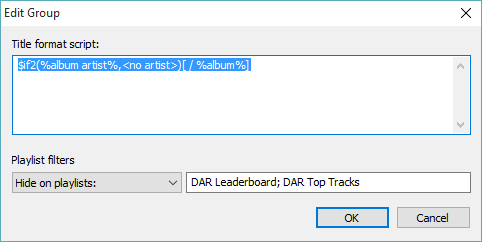
Save your changes, and there you go, a 100%-working Top Tracks playlist.
Organising your music
This section will be broken down in two parts. In the first part, I will explain on how to organise your music library with a neat, iTunes-like folder structure, and in the second part I will talk about automatic tagging with Discogs.
Editing queued tracks
Required components:
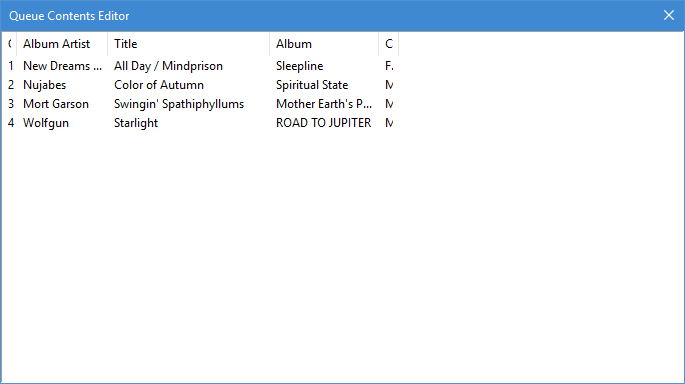
It appears that fb2k doesn't have a built-in utility to reorder queued tracks. Fortunately, Queue Contents Editor (foo_queuecontents) is here to the rescue! This component allows you to modify, add, and remove track from your queue.
File Operations
If there's one thing to love from iTunes, is that I love how it organises your music collection neatly into their own folders, separated by artist and album. It really has been what made me stuck with iTunes for too long, and when I made the switch to fb2k, I just had to research on whether fb2k would be able to do the same.
Fortunately, there's a built-in component that does more or less the same thing. File Operations (foo_fileops) is a built-in component that is included if you choose to install fb2k with some additional components.
First thing to do would be to set up your FileOps configs. Right click on any track and go to File Operations > Move to > ....
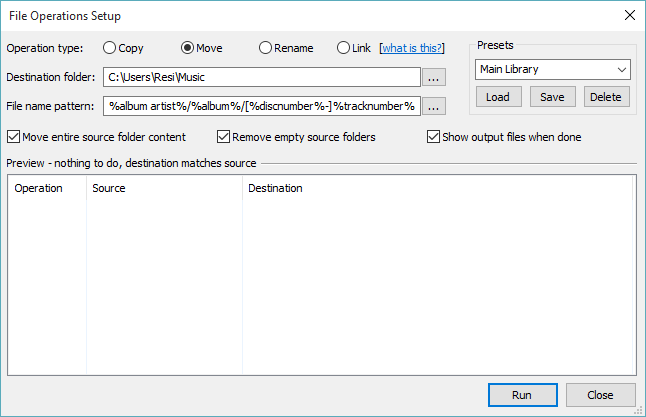
Here, you can add, remove, or save presets for FileOps. The most important option here would be "File name pattern". I use the following pattern, to make it look more like iTunes:
You can learn more about defining file name patterns on this wiki page.
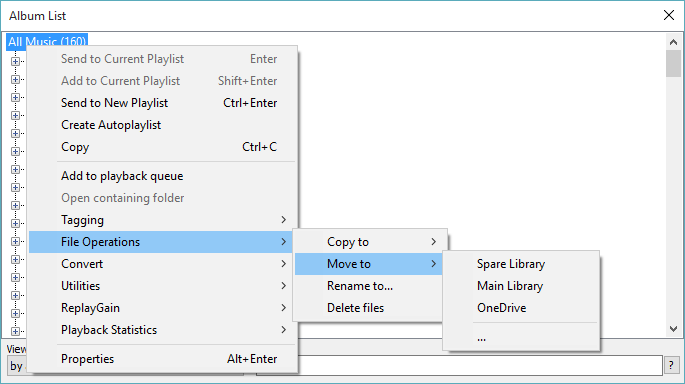
In order to organise new music in your library, first you must move your new music into a placeholder directory inside your main library folder, like _unsorted. Then head over to Library > Album List, then right click on "All Music", then head over to File Operations > Move to then select your saved preset, like so.
You will now see a preview of the changes made in your directory. Click "Run" to confirm your changes.
Tagging with Discogs
Required components:
It's very important to properly tag your music library, for the sake of consistency, especially when you're sharing what you're listening to to services like Last.fm.
Well, good news: foo_discogs does exist. Unfortunately, before you want to use it, you will have to create an account at http://www.discogs.com/ in order to get an OAuth token to access their API. If you don't want to do that, you can try MusicBrainz tagger, which grabs data from MusicBrainz's database, though it's not as robust as the one for Discogs. (You can always use a third-party tagging tool like Picard.)
To use this component, right click on any track/album, and head over to Tagging > Discogs > Write Tags. It will then look up the Discogs database for your album details.
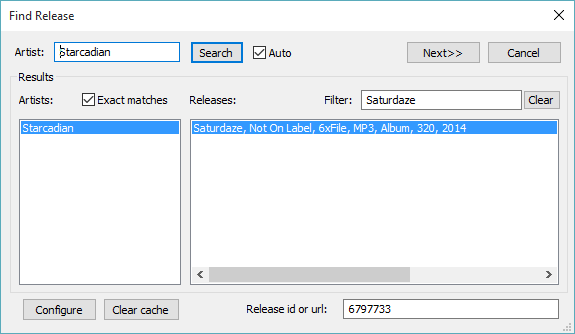
Once found, choose the appropriate release for the album, and click Next. (You can also manually type the Release ID, if you know it.)
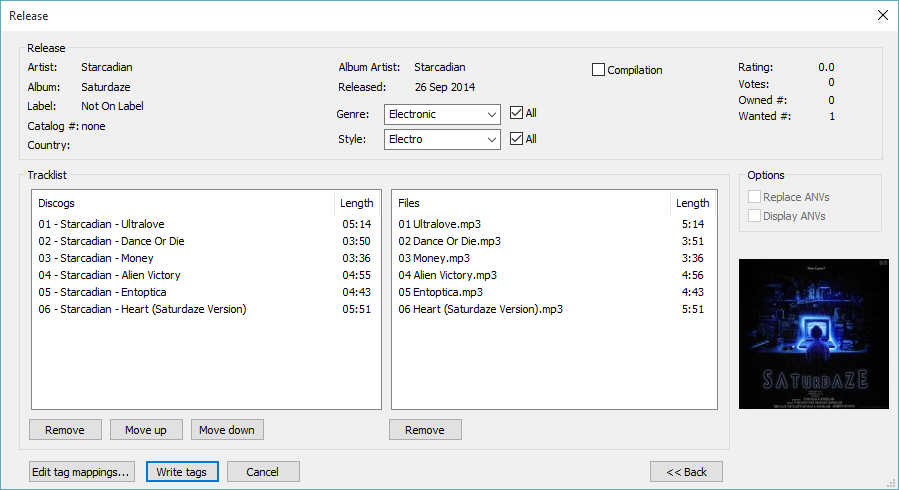
Review your changes in the next dialog box, and click on "Write Tags" to write the new ID3 tags to your tracks.
Though keep in mind that this only saves the album art into the album directory without writing it to the ID3 tags too. To do so, right click on the tracks again, and go to Tagging > Batch attach pictures.
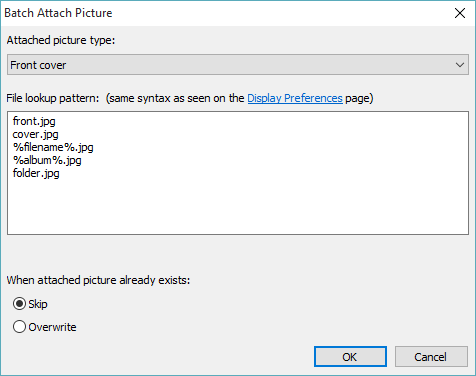
Choose to overwrite the album art already attached to the track if necessary, then click "OK" to save your changes.
Backing up your fb2k installation.
If in some cases you'll need to reinstall your computer, and you couldn't afford to lose your sick fb2k setup, you can back up your fb2k installation and transfer it to another computer. This article on How-To Geek will explain how.
Conclusion
In conclusion: yes, you can actually make your fb2k experience to be more bearable. Yes, fb2k is the one of the best, most customisable music players out there, and yes, you should use it yourself too.
Feel free to use this guide as you wish. Customisation is one of fb2k's prime experience, in fact, I encourage you to improve on this setup yourself. The setup demonstrated here is what has always worked for me, and people's preferences can be different, so feel free to change things up here and there if you don't like how some stuff works.
It's a tedious process at first, but trust me, it really will be worth it at the end of the day. Feel free to tweet at me if you need help in your setup procedure.